Installing Marlin (Arduino)
Before proceeding be sure to read Installing Marlin first and download the Marlin source code. If you haven’t done these steps yet, take one step back, then follow the link back to this page to continue with the install process.
Get Arduino IDE
The first thing you’ll need to do is download Arduino IDE and install it following the usual procedure for your OS. Arduino IDE is available for Linux, Windows, macOS, and Unix.
-
Your printer may require you to install additional libraries or a non-standard Arduino core (e.g., Sanguino, Teensy++). See Configuring Marlin and comments in
Configuration.h,Configuration_adv.h, andpins_YOUR_BOARD.hpertaining to your hardware and add-ons. In many cases, instructions and links to resources are included. -
Arduino IDE can only build Marlin for AVR, Due, and Teensy++ 2.0. If you need to install Marlin 2.0 on another board, see Installing Marlin (PlatformIO) for instructions on building Marlin with PlatformIO.
Preparation
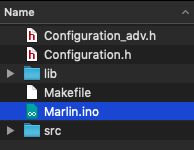
. Double-click the Marlin.ino file to open it in Arduino IDE.


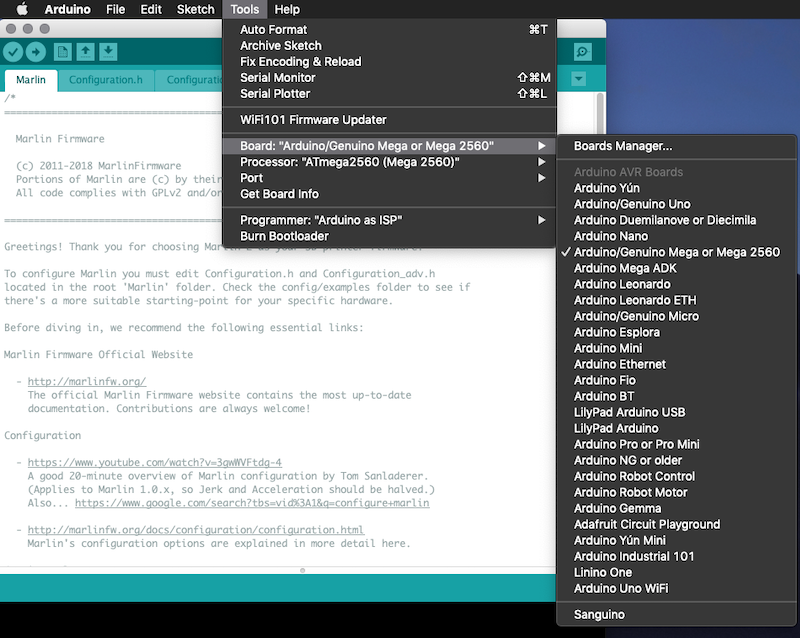
- In Arduino IDE, select your board from the Tools ⏵ Board menu.
(Note: You may need to add support for your board to Arduino.)

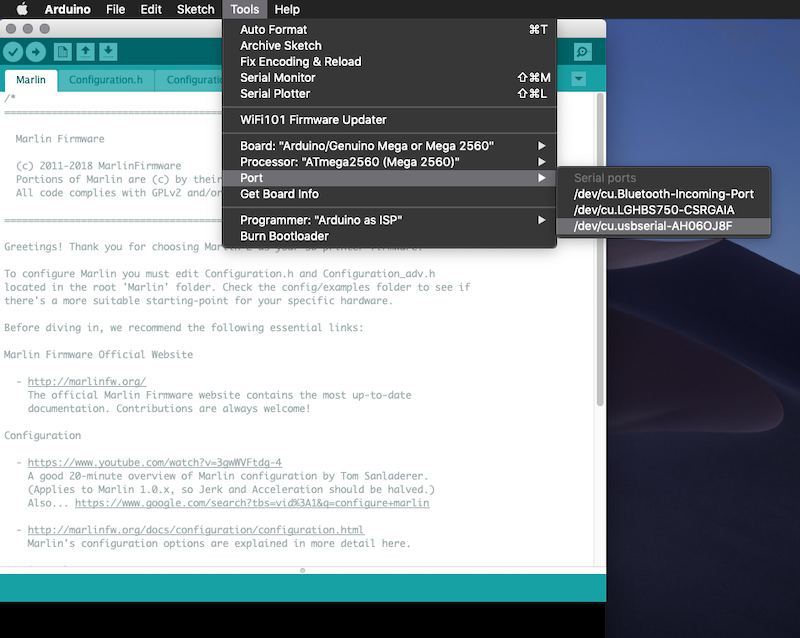
- Select the serial (USB) port your board is connected to in the Tools ⏵ Port menu.

Verify / Compile
- Click the Verify button at the top of the window to test for configuration errors. (Marlin includes several tests for common errors and outdated settings.)
If you get a warning that Marlin requires too much Program Memory or SRAM to fit on your board, you can disable features or use less expensive features to bring Marlin down to a smaller size. The SLIM_LCD_MENUS option is included as a way to save space by leaving extraneous menus out of the LCD interface.
Upload

- Put your board into Program Mode if required. (Most boards don’t require it.)
- Click Upload to flash your board. A blue or green LED on the board will blink rapidly during the upload.
That’s it! With Marlin installed you can now enjoy silky smooth printing!
Generate ‘firmware.bin’ file
For platforms that require a firmware.bin file such as the LPC1768

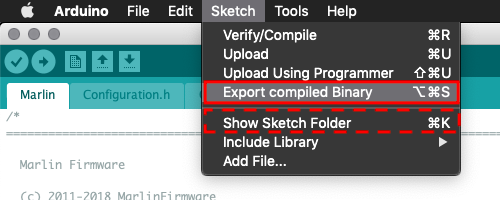
- After successfully compiling, select Export compiled Binary under Sketch
- Then transfer the bin file over to the SD card to be used
Troubleshooting
-
If you get “timeout” errors while attempting to flash the board, make sure that no other software is connected with the board. Disconnect or quit any host or slicer software (e.g., PrintRun, Repetier Host, Simplify3D, Cura, etc.) to release the serial port.
-
If nothing seems to work, your board may not have a bootloader installed. A bootloader is required to allow the board to be programmed from the USB port. Arduino IDE includes a “Burn Bootloader” function, but a programmer device or spare Arduino is required. For more information read the article Installing an Arduino Bootloader.
Once you have a programmer you can use it to install Marlin directly, but we recommend installing a bootloader first, then following the easy instructions above.